
At OMZLO, we use a ton of Raspberry Pis.
We use them to test many of our products like the PiMaster or the PiVoyager. We even use one to water our plants with crontab!
All these Raspberry Pis have one thing in common: they are headless. In other words, they have no monitor, no keyboard, and they are only accessed remotely through an SSH connection.
Let's review how it's done!
Burn the OS on the SD card
The first step in setting up a Raspberry Pi is getting an SD card and burning the Raspberry Pi OS.
You will need to download the operating system image for raspberrypi.org. The Raspberry Pi OS comes in different flavors. For a headless setup, the "Raspberry Pi OS Lite" is perfectly fine, and will take less time to download.
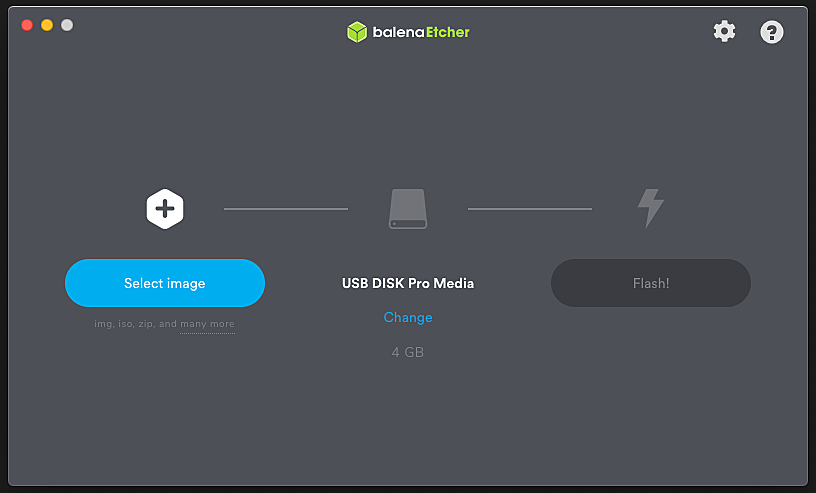
To burn the OS image on the SD card, you will need to insert it into a host computer (e.g. A PC, a MAC or Linux machine) and use a tool to transfer the OS image onto the SD card. There are plenty of tutorials explaining how to burn the OS on the SD card, but we found that the easiest approach is to use Balena Etcher for this purpose.
Modify the SD card content
Once the Raspberry Pi OS is burned on an SD card, and before you insert it into your Raspberry Pi, you will need to access the SD card from the host computer and make some changes that are necessary for a headless setup. The SD card will show up on the host computer as an external drive called boot.

By default, SSH access is disabled on a Raspberry Pi, so if you have no screen and keyboard, there is no way to access your Raspberry Pi. To enable remote access through SSH, you need to create an empty file called ssh in the root of the boot drive.
You can simply use a text editor to create an empty file called ssh and save it on the boot drive. If you are using a text editor like Notepad on Windows, make sure that it does not save the file as ssh.txt but as ssh, without any extension.
On a macOS machine, if you prefer using the command line, you can simply type touch /Volumes/boot/ssh to create an empty ssh file on the SD card. This approach will also work on a Linux machine, except that the path /Volumes/... will need to be changed to match the actual mount point of the SD card.
Enabling WiFi if needed
If you are accessing your headless Raspberry Pi through an Ethernet cable, you can skip this section.
On the other hand, if you aim to access your headless Raspberry Pi through WiFi, you will need to make another change to the SD card to tell your Raspberry Pi how to connect to the network.
Just like you created the ssh file on the boot drive, you will need to create another file called wpa_supplicant.conf. This file must have the following content with some adjustments related to your WiFi setup:
country=GR
ctrl_interface=DIR=/var/run/wpa_supplicant GROUP=netdev
update_config=1

network={
    ssid="omzlo_nomap"
    psk="secretwifipassword"
}
You will need to make the following three changes to the above sample:
- Replace
GRwith your 2-letter country code -- see Wikipedia for a list. - Replace
omzlo_nomapwith the SSID of your WiFi network. - Replace
secretwifipasswordwith the WiFi password for your WiFi network.
Did you know: adding _nomap as a suffix to your SSID in your WiFi router setup will opt you out from tracking by Google location services.
Some nice extras
Once you have created the ssh file and, if needed, the wpa_supplicant.conf file, you can safely eject the SD card from the host computer and plug it into your new Raspberry Pi. A few seconds after powering on your Raspberry Pi with the newly fitted SD card, you should be able to connect remotely with SSH from another computer by running ssh pi@raspberrypi.
You now have a headless Raspberry Pi!
There are a few extra things that you can do next to make your life easier.
Change the hostname
If you plan to have more than one Raspberry Pi in your network, it's quite necessary to give them each a different name, otherwise, each time you run ssh pi@raspberrypi, you will be unsure which one you are connecting to! To change the hostname of your Raspberry Pi, follow these steps:
- run
sudo raspi-config - Select
Network Options - Then select
Hostname - Pick a new hostname (e.g.
strawberrypi) - Restart your Raspberry Pi
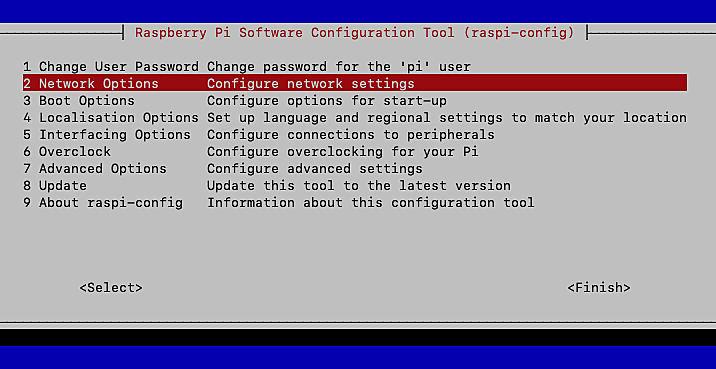
Once the Raspberry Pi has rebooted, you can connect with the new name (e.g. ssh pi@strawberrypi).
More raspi-config changes
If you are worried about other people accessing your Raspberry Pi on your network, you should use the raspi-config to change the default password of your Raspberry Pi.
If like us, you are using your Raspberry Pi for embedded projects, you should also run sudo raspi-config to enable SPI, I2C, and other relevant peripherals by selecting Interfacing Options in the main menu.
Add tmux
If you frequently use ssh to remotely access your Raspberry Pi, you might sometimes run into issues with dropped connections. For example, imagine you start editing a file remotely on your Raspberry Pi with your favorite editor (e.g. vim, nano, etc.) and stop for a lunch break. When you return, your SSH connection to the Raspberry Pi might be down and you will need to reconnect again to edit the file. This can lead to issues with unsaved changes.
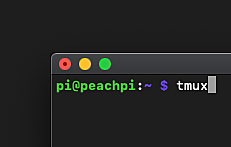
A simple solution to address this problem is to use tmux. Install that tool on you Raspberry Pi with sudo apt install tmux. Next time you connect to your Raspberry Pi with SSH, run the command tmux. Once you're in a tmux session, you can then edit a file with your favorite editor. If you later lose your SSH connection to your Raspberry Pi, you can then start a new SSH connection and recover exactly where you left things by typing tmux attach.
The tmux tool is extremely useful for headless setups and would deserve a full article on its own. Google "tmux tutorial" to learn how it can simplify your life.
Enjoy remote hacking on your Raspberry Pi!
Comments
Hi, Following your instructions and not having any luck............
" On a macOS machine, if you prefer using the command line, you can simply type touch /Volumes/boot/ssh to create an empty ssh file on the SD card " DONE AND WORKED. Decided to plug in with Ethernet connected cable and powered up pi with PIMASTER Hat on top.
I see the raspberry pi is connected to my router/ home network but when i try to ssh in i get this -
"ssh: connect to host raspberrypi port 22: Connection refused" any advice?
Cheers Graeme
Graeme, about 4 years agoThx, that's useful stuff. How do we set nocand to run as a daemon i.e. autostart ?
David M, almost 4 years agoThx, that's useful stuff. How do we set nocand to run as a daemon i.e. autostart ?
David M, almost 4 years agoHi,
don't know if you are still reading these pages but it appears 'broken' now, perhaps reapsberry pi has changed the OS. Any chance of an update or provide a suitable backdated image? i'd buy a pre-configured SD card
Graeme, over 3 years agoHi,
don't know if you are still reading these pages but it appears 'broken' now, perhaps reapsberry pi has changed the OS. Any chance of an update or provide a suitable backdated image? i'd buy a pre-configured SD card
Graeme, over 3 years agoLeave a comment